4 Steps and Tips to Achieve a Beautiful Kitchen Makeover with Milesi Wood Coatings Tinted in Greek Villa (white) and Granite Peak (gray)
Today, we'll take you on a journey to discover the transformative power of white and grey wood coating or paint in refinishing your kitchen. Whether you're looking to update your outdated cabinets or breathe new life into a tired space, the combination of Greek Villa (white) and Granite Peak (gray) Wood Coatings can create a stylish and contemporary look that will leave you in awe. Let's dive in and explore the steps and tips to achieve a beautiful kitchen makeover.
Step 1: Planning and Preparation - Before starting any refinishing project, it's crucial to plan and prepare adequately. Begin by assessing the current state of your kitchen. Consider the layout, existing color scheme, and the overall style you want to achieve. Gather inspiration from magazines, websites, or social media platforms to envision your dream kitchen.
Next, make a checklist of the tasks involved in refinishing your kitchen. This may include removing cabinet doors and hardware, sanding the surfaces, filling any imperfections, and priming the cabinets. It's essential to invest in high-quality materials and tools to ensure a smooth and long-lasting finish.
Step 2: Choosing the Perfect White and Grey Palette - Greek Villa (white) and Granite Peak Wood (gray) provide a timeless and elegant color combination that can suit various kitchen styles, from traditional to modern. The key is to find the right shades that complement each other and your overall aesthetic. Consider the natural lighting in your kitchen and the undertones in your flooring or countertops.
For the base color, opt for a crisp white shade that will brighten the space. Popular choices include pure white, off-white, or ivory. For the grey tones, consider shades like dove grey, light grey, or greige (a blend of grey and beige). These hues add depth and sophistication to your kitchen while creating a beautiful contrast with the white elements.
Step 3: Preparing and Painting the Cabinets - Begin by removing all cabinet doors, drawers, and hardware. Clean the surfaces thoroughly to remove any grease or grime. Use a fine-grit sandpaper to lightly sand the cabinet doors and frames, promoting better wood coating or paint adhesion. Remember to wear a dust mask and protective eyewear during this step.
After sanding, fill any imperfections, such as dents or scratches, with wood filler. Once dry, sand these areas again for a smooth finish. Wipe away the dust with a damp cloth or tack cloth.
Next, apply a high-quality primer suitable for the material of your cabinets. Priming creates a solid base for the wood coating or paint to adhere to, ensuring better durability. Allow the primer to dry according to the manufacturer's instructions.
Now it's time to paint! Start with the cabinet frames, using a small roller, a paintbrush or sprayer for even coverage. Work in thin, even layers to prevent drips or streaks. Once the frames are dry, move on to the cabinet doors and drawers. If you prefer a sleeker look, consider using a paint sprayer for a smooth, professional finish. Remember to allow sufficient drying time between coats.
Step 4: Adding Finishing Touches - Once the wood coating or paint has completely dried, reattach the cabinet doors and hardware. This is an excellent opportunity to update the hardware to complement the Greek Villa and Granite Peak color scheme. Consider sleek brushed nickel handles or knobs for a modern touch, or antique brass pulls for a more rustic feel.
To complete the look, consider enhancing your kitchen with complementary elements. Install new light fixtures, update the backsplash, or introduce decorative items such as plants, artwork, or vibrant dishware. These finishing touches will tie the entire kitchen together, creating a cohesive and visually stunning space.
Refinishing your kitchen using Greek Villa and Granite Peak Wood Coatings or paint can be a truly transformative experience. The combination of these colors offers a fresh and timeless appeal that can revitalize any space. By following the steps outlined in this blog, you'll be well on your way to achieving a stunning kitchen makeover. Get ready to enjoy a bright, stylish, and inviting kitchen that you'll love spending time in for years to come. Happy Refinishing!
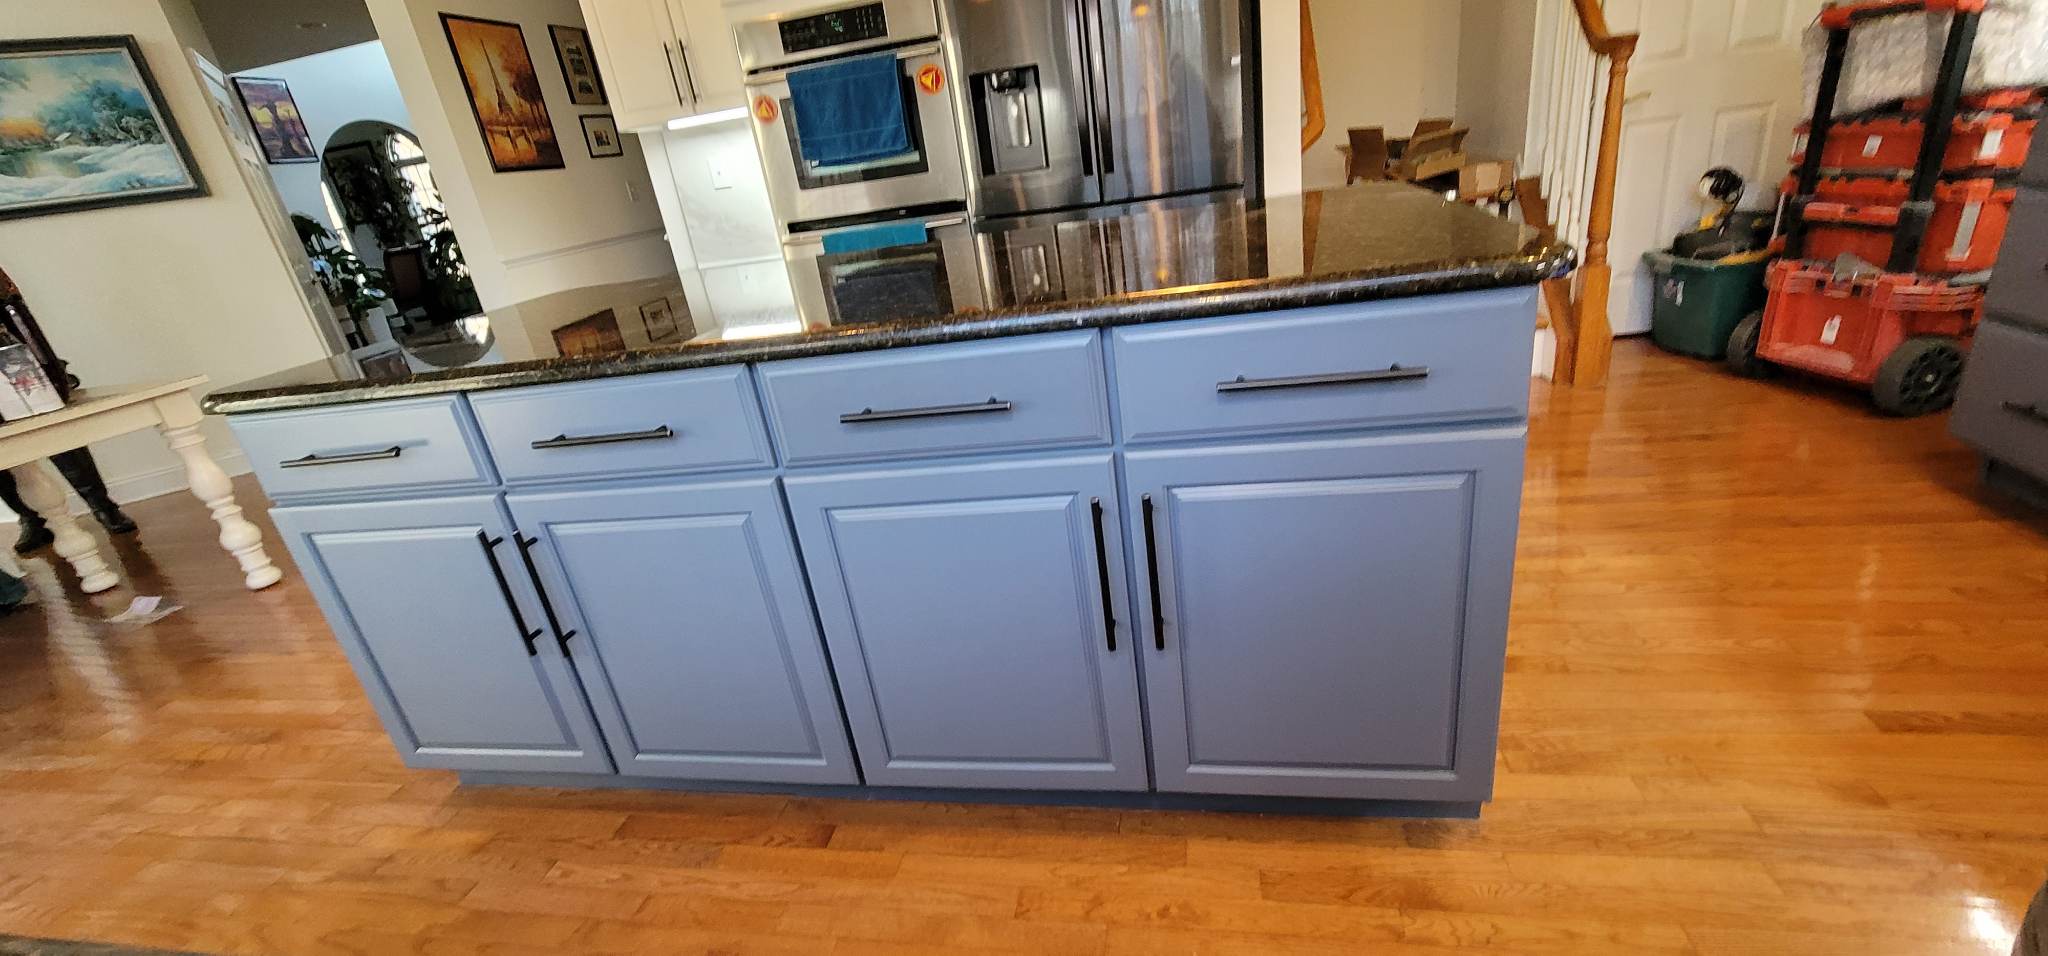
Now, see every bit of tips in action from these before, during, and after refinishing images to have an idea on how professionals do it.

Project Details:
- We use Renner primer and Milesi Wood Coatings, Milesi can be tinted to any Ben Moore or Shermin Williams color for a truly personalized space.
- The uppers are Greek Villa
- Lowers Granite Peak
- Everything is sprayed with our Apollo Sprayers HVLP
- Sanded before and between coats with our SurfPrep Sanding system
To stay updated about our latest projects, follow us on our social media profiles!
All links are here in our linktree - https://linktr.ee/graceonbroadway
BEFORE


DURING REFINISHING


AFTER