
How To Use Découpage And How to Add Ageing Effect
Découpage is simply adhering a piece of photo paper to an object and adding a layer of top coat to permanently fuse them together. It can be a photo of your favorite view, your pet or even your family photo.
Applying découpage is quite simple but adding an artistic and antique touch to your design can level up any furniture TEN-FOLD!
You'll learn everything you need from applying découpage to adding an antique touch to your design through this tutorial using a photo that's printed on regular paper using a laser jet copy machine.
Note: If you use an ink jet printer, the ink will bleed.
The Products that I used are as follows:
Step 1 – Prepare and cut your design.
Step 2 - Apply base paint on your project and let it dry. I layered Pine Cone and Kudzu for my base color because it complements the color of the design that I am going to use.

Step 3 – After the base paint is dry, apply a fair amount of topcoat on the portion with base paint on. I used Clear Coat Satin by Dixie Belle in this project.

Step 4 –Place the découpage around your project and cut any excess paper.
Note – If there are portions on your découpage that’s not adhering, just add topcoat below those portions and continue scraping the bubbles and wrinkles out.
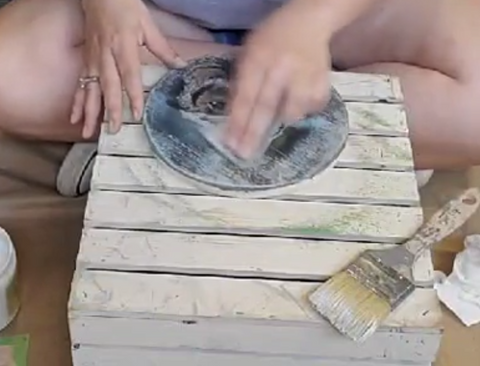
Step 5 – Remove excess bubbles using your fingertips, foam, or even your Surf Prep rad pad.
Step 6 – Use Surf Prep Rad Pad or sanding grit to sand around the edges of the decoupage so that it appears to be the paper has been there all the time.
Note - It’s okay if the edges turn white after sanding because of the paper, the next step will fix those areas.

Step 7 – Apply a thin layer of Brown Wax around the edges where you sanded. I used Best Dang Wax by Dixie Belle.
Step 8 – Apply a layer of topcoat above the découpage to permanently seal it.

This method can also be applied to any kind of project, so be sure to explore and don’t be afraid to use what you learned here to make your very own furniture art!
Watch the full video tutorial for this project here