
Learning Layering and Raised Stencil
Decorating any project with stencils is a challenge, but once mastered it can give you outstanding results. Doing a raised stencil, on the other hand, will give you an even more challenging task, but it will surely give any project a design like no other.
In this tutorial you can learn how to stencil and layer a raised stencil above it, which can result in a gorgeous piece of furniture art.
The products that I used are as follows:
Step 1 – Paint base color on the parts and let it dry. I used Caviar as my base color.

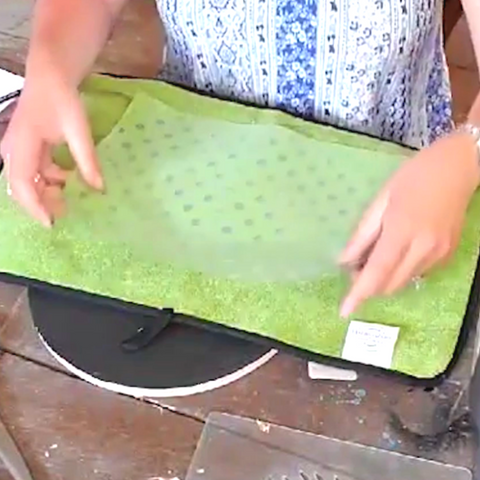
Step 2 – Align and place the silk screen stencil to your desired area.
Note – The adhesive on the stencil is very strong, if it's your 1st time using it, to lessen the adhesive, you can stick it 1st on a rag or towel before using it on your project.
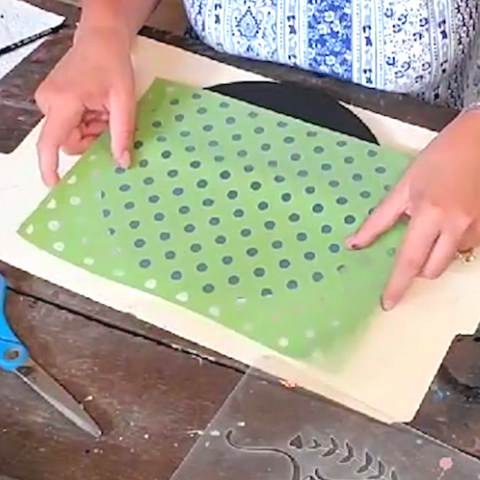
Step 3 – Paint over your stencil and let it dry. I used Cotton by Dixie Belle Paint Company for the polka dot stencil here on my project.

Step 4 – Align and place your 3D Stencil.

Step 5 – To thicken the paint I used White Dixie Belle Mud and I mixed it with Peony by Dixie Belle to get a light pink colored paint.
Note - You can mix and match all sorts of colors using this method.


Step 6 – Spackle the mixed paint over the 3D stencil and let it dry.

Finish product

This method can also be applied to any kind of project, so be sure to explore and don’t be afraid to use what you learned here to make your very own furniture art!
Watch the full video tutorial for this project here